CI/CD Pipeline with Spring Boot Application
Let’s start learning and creating CI/CD Pipeline, and DevOps basics by practicing. We will use Spring Boot Application and Maven using GitHub Actions throughout this process. In addition to these, we will write a unit test.
Introduction
In this article, we will mention and apply the Continuous Integration/Continuous Deployment (CI/CD) Pipeline, theoretically DevOps basics, and how to create Docker Image-Container and deploy on the Docker Hub using our pipeline in an automated way.
Requirements
- Spring Boot Project (recommended to apply the previous article)
- GitHub Account
What is DevOps?
The abbreviation DevOps is formed by combining Developers and Operations words. DevOps automatically processes applications written by developers.
Briefly, DevOps is the lifecycle and simplifies the development and deployment processes. CI/CD Pipeline is one of the DevOps processes. Let’s examine in-depth that process.
What is CI/CD Pipeline?
CI/CD Pipeline automates repetitive processes and allows us to save time. We can add as many processes as we want to our created pipeline. These processes are called stages. Stages could be the source stage, build stage, test stage, deliver/deploy stage, and more. It depends on our needs.

The other most popular CI/CD tools are Jenkins, Circle CI, GitLab CI/CD, and more. These help us in automating builds, tests, deployments, etc. But as you can see, we will use GitHub Actions. I chose this option because most people have a GitHub account. In just a short time, you can create a CI/CD pipeline using your account.
Continuous Integration
The latest pushed developments are triggered depending on the condition we specify (such as merging the main branch or opening a pull request). Then the code automated builds and tests are run.
Continuous Delivery
The next step of Continuous Integration. The step is responsible for packaging a product in preparation for the next step, called Continuous Deployment. I will show this step with the Continuous Deployment step.
Continuous Deployment
Continuous Deployment is the final step of the pipeline. The ready product is automatically deployed to a server or other desired location in this step. In summary, it is moved from local to live.
Writing a Unit Test
Let’s write a unit test before we create the pipeline. If I must mention very briefly we are able to want to test your new features-codes as developers. The unit test is used for this and I will use JUnit5 and Mockito. Unit test is not the main subject of this article, therefore, I will not explain best practices but if you want to learn more things you can review this URL.

I will add a test package to the business package. Then right-click on Product Manager class > Generate > Test. After doing these you can see the Create Test popup and click OK. We can access the test package under product module > src as seen in the picture above and are ready to write a unit test.
As you see above, I just wrote a unit test for a method. You can reach the ProductManagerTest class. No need to add a new dependency for writing a unit test. This will be used in the next parts.
In the meantime, even while writing a unit test, you can notice your mistakes or necessary changes and start correcting the code we have written. I did this too and there were minor changes in ProductManager class, you can check it again if you want.

If you run the test method, you must see a test result like in the above image. Let’s start creating our pipeline.
Creating the Pipeline using GitHub Actions
As I said before, GitHub Actions is a CI/CD tool and you must have a GitHub account for using that.
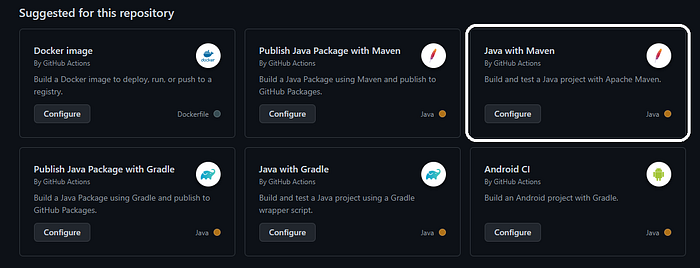
Move forward to your GitHub Repository > Actions and click Configure in the “Java with Maven” option.
A ready file will appear in front of you as you can see below. There is only this rule. Workflow files must have a .yml or .yaml the file extension and use YAML syntax.
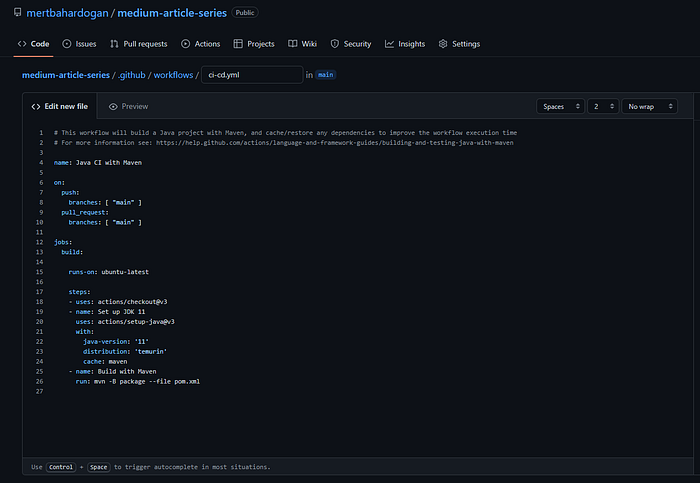
Firstly, I will change the file name as ci-cd.yml. After that, we can start writing our CI/CD file. If you want, you can trigger it by adding different files under the /workflows directory instead of a single file (ci-cd.yml).
Docker Hub
If you do not have one, create yourself a hub.docker.com account. After that, we create a repository. The repository name you will write here and your account number will be used in the pipeline file.
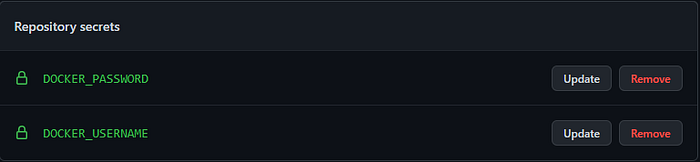
Your created account username and password are also needed in the repository file. Secrets must be created in your GitHub repository > settings > security-secrets-actions before editing the pipeline file.
That will be needed when we dockerize our project on our pipeline. You can understand it by following the comment lines in the ci-cd.yml gist a little later.
Docker
In my previous article, we had run Dockerfile locally. But here the Dockerfile will be running remotely, we must make slight changes for this.
Firstly, change the path as “product/target/product.jar” in COPY layer. And after that, add <finalName>product</finalName> in build tags in product.jar. The name between the final tags’ must same as the Docker Hub repository name. You can reach all of these changes through this commit.
CI/CD File (ci-cd.yml)
We are ready to review the pipeline file, I would like you to pay attention to the comment lines. If you want to know deep knowledge about GitHub Actions, you can review this link.
Now, we will pull our codes on the remote and push new changes. Let’s push and review the pipeline.
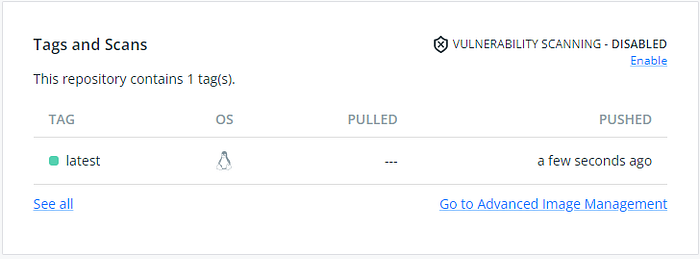
And the results are as follows, everyone can download this Docker image and use it for free. If you want to react to my Docker Hub Link.
We’ve successfully created the pipeline and you can reach all steps (like unit testing, building, dockerizing, and more) mine here and directly reach my repository about this article on GitHub.
Conclusion
I’ve wanted to introduce the relationship between DevOps and Backend with my backend developer knowledge in the two-series article.
While I am writing my articles, I assume that you know some basics. Nevertheless, if you have any questions which are related to these topics, please do not hesitate to contact me via Email or LinkedIn.